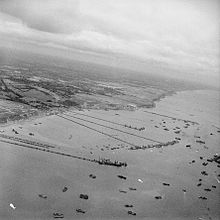
After exploring the gun emplacements, we worked our way down to the area overlooking Gold beach and could look at some of the remaining barges that were placed out there in the ocean to serve as an unloading dock for all of the logistics of the war. In this picture below, you can see some of the remaining Mulberry Artificial port. (The black and white picture is a war photo of the beach area during the invasion).
This plaque depicts the cliffs at Cherbourg.
The plaque shown here gives you a one-over-the-world view of the layout of the beaches and areas of responsibility. To get a better grasp of this area, click on it to enlarge the picture.
So following this, we worked our way down to the actual beaches. My dad's artillery unit came ashore here so this was a must see portion of our trip. Once we got to the beach itself, I just had to take off my shoes and walk out into the water, the same water where so many came ashore and where so many men lost their lives for our freedom. As you can see from the picture, the beach barriers and impediments are gone, and the tide is out. No one is shooting at anyone so I decided to start walking out to get an idea of what their distances might have been. Again, if you click on these pictures, you can get an idea of how far I went out before I got to water.


Once I got here, I turned around and stared back at the beach area. It's absolutely unbelievable that they went that far into the blistering fire of the Germans. As soon as the front gates fell on the landing craft, there was nothing between them and the enemy guns. I took this picture of a house on the beach that I think was a part of the Band of Brothers mini-series. The guides tell us that it wasn't used that way, but it sure would have been a good place for a machine gun (at least until the first naval fire started).
Supposedly the open window in the left on the second floor is where the Germans had set up their guns. Then I just had to take another picture of that "guy" in the shadow. Looks a little different on the beach.
"They
had come to win.”
They hadn't come here to fear. They hadn't come to die. They had come to win.”
(Stephen E. Ambrose)
Hooah
P.S. I forgot to put in here a couple of pictures that really highlighted the difficulty Americans and the Allies had storming the beaches and working inland. They also highlighted the preparations the Germans had taken to stop or at least make it very difficult for the Americans to get off those beaches.
These are pictures of machine gun emplacements built into the side of hills bordering the road leading from the beaches. Granted there has been a great deal of growth of underbrush over the years, but they were really pretty hard to pick up and they look pretty well-built.
 |
I know it is hard to see but this gun emplacement is shown pretty much in the center of this picture, about 1/4" down from the top (the little dark spot).Hard to see and even harder for the GIs to take it out.
|
 |
This gun emplacement is in the middle of the big concrete wall just above the chimney. It is losing some of its surrounding ground but was an extremely well-built gun port with a field of fire straight up the road from the beach. Troops would move up the road and past the machine gun before the Germans would open up on them.
|
These were just two of the ones that I got pictures of, but the guide told us that they were dispersed all over the sides of the hills and cliffs.


No comments:
Post a Comment